(SD Card Raw RGB565 Converter v1.0 - Download Link)
This tool converts any media supported by FFMPEG into a 16b RGB565 stream. Optionally, it can upload the stream to an SD card as RAW data for sequential sector reading, using a rudimentary file system stored in the first few sectors. This file system is used to indicate the first and last sectors of each file sequentially.
|
Note: SdCardWriteRGB565.exe may sometimes fail to write to the SD card when using "CONVERT & WRITE" for large video files. A temporary workaround Fix SdCard Write Fail. |
SD Card RAW File System:
0.Before you can use the Sd Card as raw media storage with SdCardWriteRGB565.exe, it has to be formatted with FAT32 system. If other file system (NTFS, exFAT, FAT) is used, sometimes even with FAT32, the SdCardWriteRGB565.exe will fail to write to the card. As a temporary workaround see Fix SdCard Write Fail.
1.The first SD card sector (4096 bytes), or Sector0, is used to indicate the start of each file in the sequence. Since the first file written to the SD card, File0, always starts from Sector1, there is no need to specify its start sector.
In the first 4 bytes of Sector0, we write the end sector of File0 (e.g., Sector479).
The next 4 bytes in Sector0 will indicate where File1 ends (e.g., Sector1328), and so on.
2.Files are written sequentially from sector to sector.
To append data to the SD card, we need to know the last file written. Reading files from the RAW SD card data is done easily, sector by sector. After writing data to the SD card, SdCardWriteRGB565.exe will generate a $define for inclusion in your code, indicating the file properties, as explained on this page.
Note:
-BMP files are copied byte-by-byte, and their file structure is preserved.
-RGB files are written as a sequence of 16b RGB565 values that form the movie bitstream. Therefore, we need to know the number of pixels per frame in each direction (width and height), which is also included in the generated $define.
SdCardWriteRGB565.exe converts:
-Pictures into BMP files with a 16b RGB565 color palette.
-Videos into a stream of frames with a 16b RGB565 color palette.
Instructions:
1.Before starting SdCardWriteRGB565.exe, insert your SD card (if used). If there is no file system, ignore any messages.
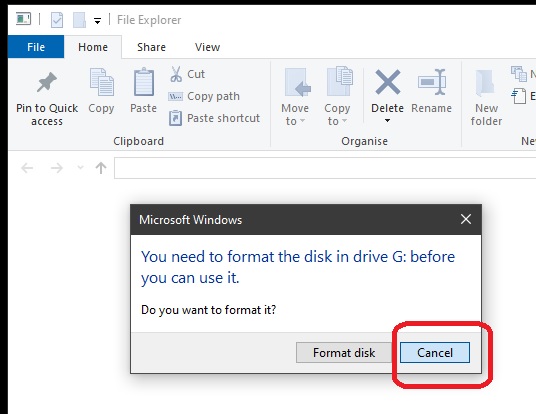
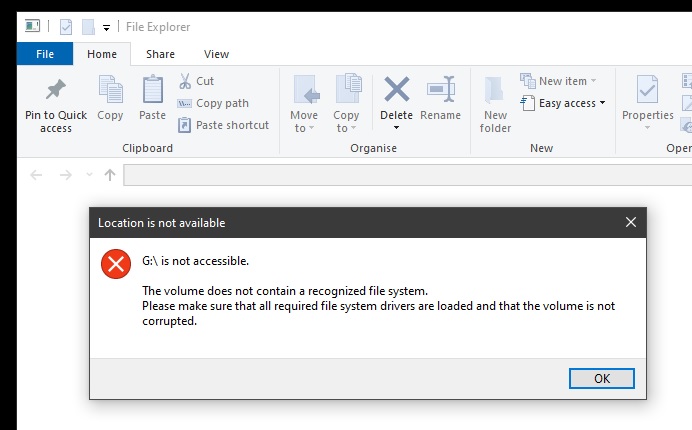
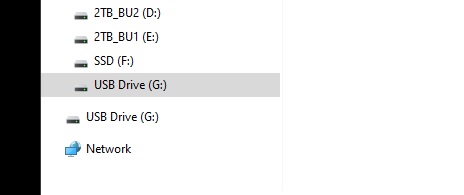
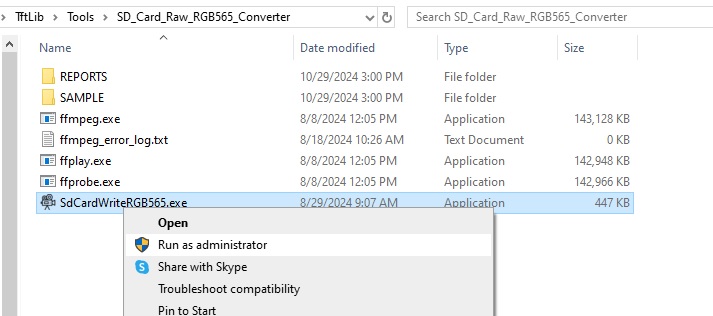
2.Open SdCardWriteRGB565.exe as Administrator; otherwise, the SD card won’t be accessible. If using an SD card, you’ll need to select the SD card drive G:\ in this example. Normally, SdCardWriteRGB565.exe will automatically select the SD card drive from the available removable drives, but please confirm that it is indeed the correct drive letter.
If SdCardWriteRGB565.exe is run without Administrator privileges, writing to the SD card will not be possible, although file conversion can still be completed.
Attention: Writing RAW data to an SD card will erase any existing file system, resulting in the permanent loss of all information on the card.
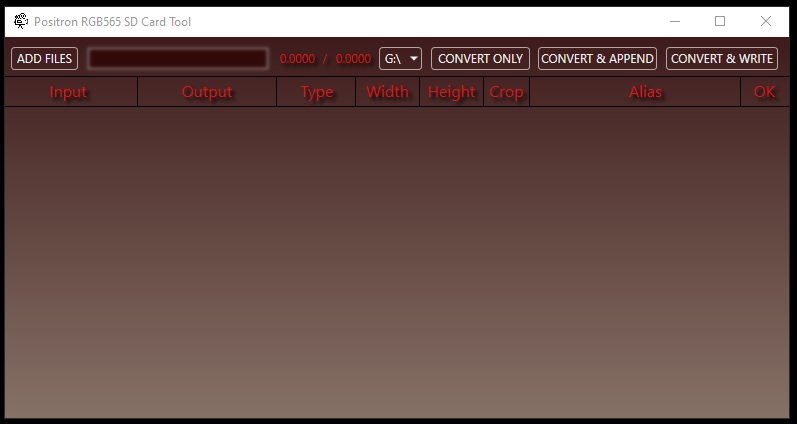
3.To add files for batch conversion, click ADD FILES as many times as needed, and new empty lines will appear.
-More lines can be added later if needed.
-To remove a file from the batch, simply delete all information in the line.
-Any empty lines will be ignored.
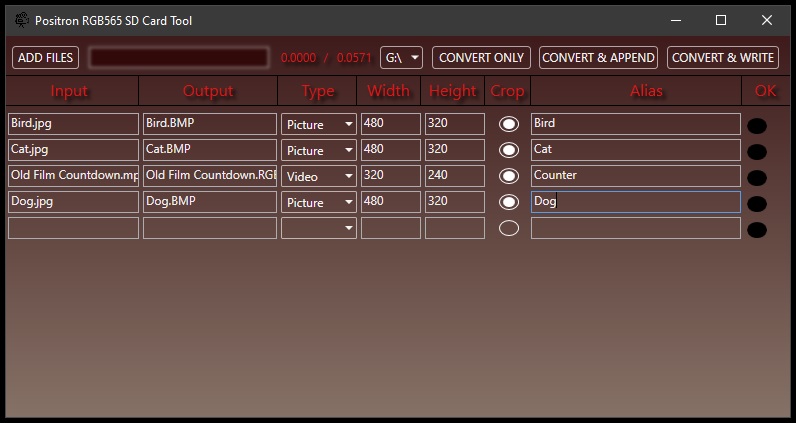
Input - Double-click in the line field under "Input" to add a new video or picture file for conversion.
Output - This is the output file name, automatically generated from the input file name. Pictures will have a BMP extension, and videos an RBG extension.
Type - Indicates the file type, either picture or video. It will be recognized automatically; if not, the file may be corrupted or its encoding unsupported by FFMPEG.
Width - Enter the output width, typically equal to or less than the TFT screen width.
Height - Enter the output height, typically equal to or less than the TFT screen height.
Crop - Click to enable or disable picture/video cropping:
-Enabled - The output file will maintain the original aspect ratio by cropping height or width equally from the center.
-Disabled - The aspect ratio will be ignored, and the file will be converted to the selected width and height.
Alias - An alias that will be used in the generated $defines for Positron to include in your code listing.
To the left of the SD card drive letter, you’ll see the estimated data size in GB to be written to the SD card (e.g., 0.0571 GB, or roughly 57 MB).
4.Convert files - Three options are available:
CONVERT ONLY - Only converts the input files, placing the output files in the same folder as the input files.
CONVERT & APPEND - Converts the input files, places the output files in the same folder as the input files, and appends them to the selected SD card drive. This requires that the SD card was first used with the "CONVERT & WRITE" option to create the rudimentary sequential file system.
CONVERT & WRITE - Converts the input files, places the output files in the same folder as the input files, formats the SD card with the rudimentary sequential file system, and writes the files to the selected SD card drive from the beginning. This will erase any previous data on the card.
To the left of the SD card drive letter, you’ll see the estimated data size in GB and the current transfer progress (e.g., 0.0172 / 0.0571, or 17.2 MB out of a total of 57.1 MB). The green progress bar shows the current file conversion and upload progress.
During conversion, the file currently in progress is grayed out, while completed files are marked with a white check under the "OK" field on the right.
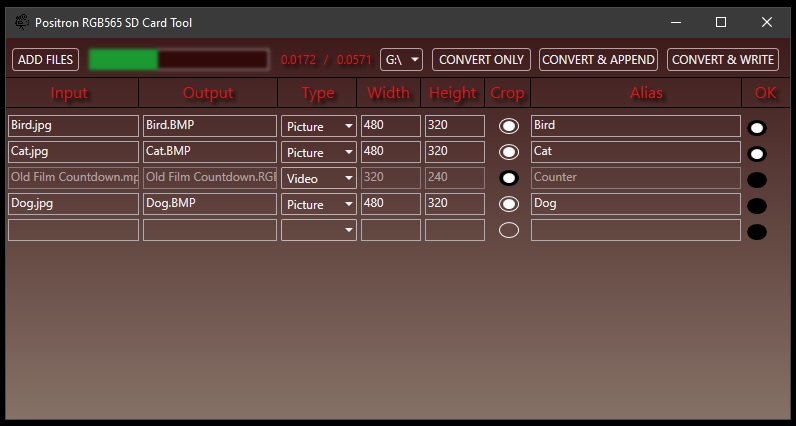
5.When the process finishes, converted files are saved in the same directory as the original files.
A report with the necessary defines for inclusion in your Positron program listing is generated and saved as a text file in the "REPORTS" subfolder, named with the current date and time.
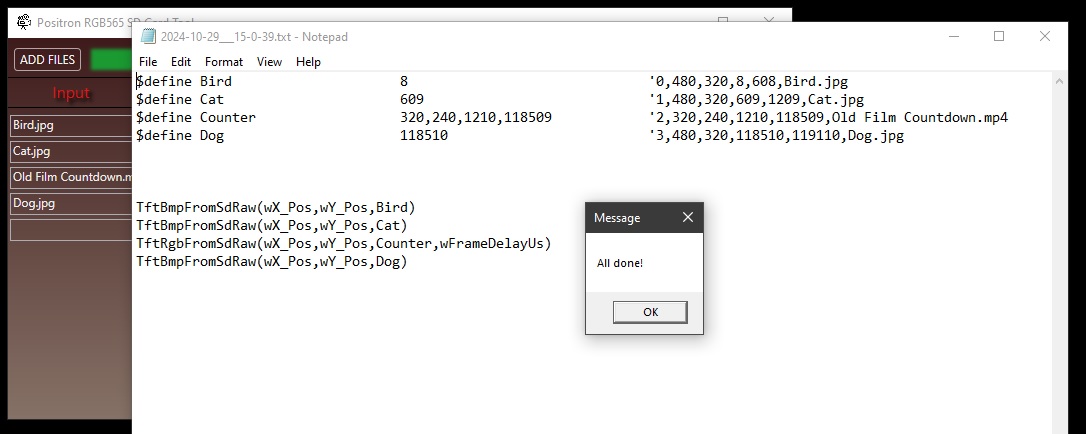
6. Include the generated defines in your program code listing.
|
$define Bird 8 '0,480,320,8,608,Bird.jpg $define Cat 609 '1,480,320,609,1209,Cat.jpg $define Counter 320,240,1210,118509 '2,320,240,1210,118509,Old Film Countdown.mp4 $define Dog 118510 '3,480,320,118510,119110,Dog.jpg TftBmpFromSdRaw(wX_Pos,wY_Pos,Bird) TftBmpFromSdRaw(wX_Pos,wY_Pos,Cat) TftRgbFromSdRaw(wX_Pos,wY_Pos,Counter,wFrameDelayUs) TftBmpFromSdRaw(wX_Pos,wY_Pos,Dog) |
$define Bird, Cat ... serves as an alias, replacing each alias with the information beside it whenever that alias is encountered. For example, whenever the Pre-processor detects "Bird," it will substitute it with "8"; if it detects "Counter," it will replace it with "320,240,1210,118509." These defines need to be placed before any commands to display those images or play the videos.
The commented-out section of each line provides additional information.
'0,480,320,8,608,Bird.jpg
0 - file sequence number
480 - picture width
320 - picture height
8 - file start sector
608 - file end sector
Bird.jpg - original file name
'2,320,240,1210,118509,Old Film Countdown.mp4
2 - file sequence number
320 - video width
240 - video height
1210 - file start sector
118509 - file end sector
Old Film Countdown.mp4 - original file name
TftBmpFromSdRaw(wX_Pos,wY_Pos,Bird) and TftRgbFromSdRaw(wX_Pos,wY_Pos,Counter,wFrameDelayUs) are commands you can use later in your code. Instead of writing out the entire command, you can simply copy and paste them, adjusting the parameters as necessary. More details on these commands are provided in the Library Description section.
Created with the Personal Edition of HelpNDoc: Effortlessly Edit and Export Markdown Documents