User Manual
… visits


Positron Font Foundry turns fonts on your Windows PC into font files for TFT & EPD Graphic Library 2, the Positron BASIC graphics library for PIC microcontrollers.
Choose a font, adjust its appearance, check the preview and export it. You can also correct individual pixels, prepare several fonts at once, or reopen a previously generated font without having the original Windows font installed.
The application was previously called SndFontGenerator. It supports two output formats:
|
Format |
How it looks and behaves |
Useful for |
|
SND |
Every character uses the same size box and the same spacing. |
Clocks, counters, numeric readouts and neatly aligned status fields. |
|
BDF |
Each character keeps its own shape, size and spacing. |
Labels, menus and proportional text. |
Both produce a Positron BASIC .inc file. The BDF option produces the library's compact font tables, not a standalone .bdf file. See SND vs BDF — Choosing and Understanding Font Formats for examples and the file reference.
The Generate button may be labelled Generate .inc + .bmp in this version. The preview file actually written is PNG.

Choose a font and inspect the grid before generating the output.
Windows Fonts folder uses installed Windows fonts. Custom TTF folder lets you use supported .ttf and .otf files from a folder without installing them first.
Type part of a name in the filter box to narrow the main font list. Use the Bold and Italic checkboxes to choose the style; leaving both unchecked selects Regular. Available styles depend on the font family.
Choose your source and finish filtering before selecting fonts for a set. Changing the source or filter rebuilds the lists in this version, so check your Make Set selections afterward.
Start and End are decimal character numbers, also called codepoints. Both ends of the range are included. For example, 48–57 gives the digits 0–9.
The range presets provide convenient starting points:
|
Preset |
Range |
Contents |
|
Basic |
32–126 |
Common Latin letters, numbers, punctuation and space. |
|
Full |
32–255 |
The basic range plus additional character positions through 255. |
|
Digits |
46–57 |
Period, slash and the digits 0–9. |
|
Math |
42–62 |
A compact range containing digits and several useful symbols. |
|
Lower |
97–122 |
Lowercase a–z. |
|
Upper |
65–90 |
Uppercase A–Z. |
You can enter a custom range within 0–65535, excluding 55296–57343, which are reserved Unicode positions. A font may not contain every character in the range; inspect the result for blank or replacement characters. Your firmware must also use the matching character numbers. A generated Unicode range does not by itself add UTF-8 decoding to your application.
Smaller ranges produce smaller files and are quicker to preview and generate. For a counter, you may need only numbers and a few punctuation marks.
In SND mode, Width and Height are pixels. A setting of 16 × 24 gives every character a 16-pixel-wide, 24-pixel-high box, including narrow letters and spaces.
The four Padding values reserve blank space inside that box. Use them to leave margins or adjust where the character sits. Excessive padding leaves too little room for the character.
In BDF mode, the size field is Point size (pt). Width is not used to force characters into a common box.
The application converts points to a render size in pixels using 96 DPI. For example, 18 pt becomes 24 px, and 20 pt becomes 27 px after rounding. This sets the font's rendering scale; it does not mean every character has that exact ink height. An accent, a capital letter and a period naturally occupy different-sized areas.
A slot is an identifier from 0 to 255, shown as F0, F1, and so on. It appears in the filename and in the names of the font tables inside the .inc file.
You can keep several alternative files for the same slot on your PC. However, fonts used together in one firmware build need distinct slot identifiers: different filenames do not prevent duplicate table names inside a program.
Controls apply to the selected format. Start with the defaults, then make small adjustments while watching the preview.
|
Control |
Format |
What it changes |
|
Threshold |
SND |
Decides which shaded pixels become solid ink. A higher value generally includes more pixels; a lower value includes fewer. |
|
Auto-center ink |
SND |
Fits and centers the character within the available cell. Turning it off uses baseline-based placement that follows the font's original proportions more closely. |
|
Weight |
BDF |
Thickens strokes with positive values and thins them with negative values. Zero leaves the strokes unchanged. |
|
Tracking |
BDF |
Increases or decreases the distance the drawing position moves after each character. Positive values spread text out; negative values tighten it. |
|
New / Old engine |
BDF |
Offers two ways of converting the original font to pixels. Compare them if small letters or curves do not look right. |
How Auto-center avoids blowing up small marks. A period, an accent and a capital letter naturally occupy very different amounts of ink. Rather than scaling each character to fill the cell on its own — which would make a period balloon to the same visual size as a capital — Auto-center measures one capital reference letter once per job (the first of H, M, 8 or A that actually renders ink in the selected font) and reuses that single scale for every character in the range. Capitals fill the box; small marks stay proportionally small.
Weight is stepped in this version. Although the slider runs from −50 to +50, the adjustment applies up to three whole-pixel dilation or erosion passes, and the pass count is rounded from the slider value: roughly −8 to +8 gives no visible change, ±9 to ±24 gives one pass, ±25 to ±41 gives two passes, and ±42 to ±50 gives three. Several neighbouring values can therefore look identical — move farther along the slider to see a difference. Tracking also rounds to whole pixels, and its effect depends on font size.
The New and Old engines use different rendering paths. Compare their output at the intended font size: curves, stroke thickness and individual pixel shapes can differ. Neither engine is guaranteed to look best for every font.
Old engine — known calibration issue
As of this build, the Old engine carries a known, not-fully-resolved calibration issue: its horizontal ink position (BBOffsetX) can come out a few pixels off compared with the New engine or the old otf2bdf tool, by a variable amount rather than a fixed offset. If characters in Old-engine output look shifted sideways relative to what you expect, try the New engine or compare both before relying on exact horizontal placement.
The grid shows the selected character range in order. SND uses the fixed cell size you chose. BDF uses a shared display area large enough to show the characters and their positions, while each character keeps its own dimensions.
Use the mouse wheel over the preview or the Zoom +, Zoom − and Fit buttons. Settings changes may fit the preview again, so your chosen zoom level may change after a redraw. The mouse wheel over the Make Set font list scrolls that list.
The TFT toggle shows the characters against a black screen area. Set the screen width and height and use the arrow buttons to pan.
Treat this as a visual guide, not an exact reproduction of your device's text layout. In particular, the current BDF TFT view adds display spacing and uses its own line-height and wrapping rules. Tracking can affect it, but the spacing is not necessarily identical to the text drawn by your firmware. Check the final font on your target display when exact placement matters.
The preview normally refreshes shortly after a setting changes. While you are typing, incomplete or invalid settings can leave the previous preview on screen. Click Render Preview Grid to request a refresh and display any error message.
Large fonts and wide character ranges can take time. The application may pause while an individual font is being rendered.
TFT view is a visual check; final firmware layout can differ.
Click a character in the grid to open the pixel editor. Each small square represents one output pixel.
The editor shows the complete SND cell or the shared BDF editing area. For BDF, adding pixels outside the current yellow outline enlarges the saved ink rectangle, within the available editing area. This changes the character's shape, not its cursor advance.
Corrections on Font & Preview belong to the current rendering settings. Changing a font or rendering setting can clear them; zooming or switching between grid and TFT view does not. Make your adjustments first and pixel corrections last, then generate the file.
These preview corrections are not included in batch jobs. To keep them, generate the single font directly, or edit its exported .inc afterward using Edit Font File.
Very large characters can create a large editor window in this version. Work at the intended display size rather than enlarging the font just to inspect pixels.
Click individual cells to correct a character. The yellow outline follows its ink.
On Font & Preview, choose Add to Batch Queue (keeps these settings). This adds a job with the current settings. Later changes to the controls do not change that queued job.
Repeat to prepare different sizes, styles, ranges or formats. SND and BDF jobs can share the same queue.
Make Set does not start generation. It prepares jobs using the current settings. You can add another set with different settings before running the queue. Use Remove Selected or Clear All to remove queued work. To change a job's settings, remove it and add it again with the desired settings.
When there are more selected fonts than slots, a Yes/No message explains that numbering will repeat. Choose Yes to queue all selected fonts, or No to return without adding that set.
For five fonts and slots 11–13, the assignments are:
|
Font in the selected list |
Assigned slot |
|
First |
F11 |
|
Second |
F12 |
|
Third |
F13 |
|
Fourth |
F11 |
|
Fifth |
F12 |
The range repeats from its beginning; it is not a search for unused slots in the existing queue. Repeated slots are useful for producing alternative fonts. Select just one alternative per slot when assembling your firmware, or generate them with different slots if you need them together.
Before adding any jobs, Make Set checks the proposed .inc and .png names against the existing queue, the other fonts in the new set and the current output folder. Comparisons ignore letter case.
Different font names usually give different filenames, but spaces and punctuation are removed. For example, names such as My Font and My-Font can become the same filename. Some rendering settings also do not appear in filenames.
If a collision is found, the dialog identifies the name and none of that set is added. Adjust the selection or slots, remove the conflicting queued job, or choose another output folder, then try again.
Run Batch processes the queued jobs in order. The log records each result and finishes with totals for successful and failed jobs. A failed job is reported, and the run continues with the remaining jobs.
The glass progress bar sits below the log heading and matches the log's width. It advances after each processed job, including a failed job, and returns to zero three seconds after the run finishes. It measures jobs processed, not time remaining or progress within one font, so it can remain still during a large job.
Make Set only adds jobs, so it does not start generation progress. The queue remains after a run; pressing Run Batch again processes it again.
Not an overwrite safeguard
The filename check above runs only when Make Set is pressed. It is not a general overwrite safeguard: single-font generation, manually added jobs, rerunning a queue, or changing the output folder afterward can still replace existing output. Use separate folders for versions you want to keep.
Review the queued jobs, then start Run Batch.
Each successful generation writes two files with the same base name:
Examples:
|
Example filename |
Meaning |
|
F2_SND_16x24_Arial_Regular.inc |
Slot 2, SND, 16 × 24 pixel cells, Arial Regular. |
|
F2_BDF_27px_Arial_Regular.inc |
Slot 2, BDF, a converted render size of 27 pixels, Arial Regular. |
The 27px in the BDF name comes from the selected point size converted to pixels. It is not taken from the first character, an average, or the tallest character. Individual character dimensions are stored inside the file.
Names include slot, format, size, font family and style. They do not include every setting, such as character range, weight or tracking. Different versions can therefore have the same name. The .inc and .png are written separately; if generation fails, check the log and output folder before using either file.
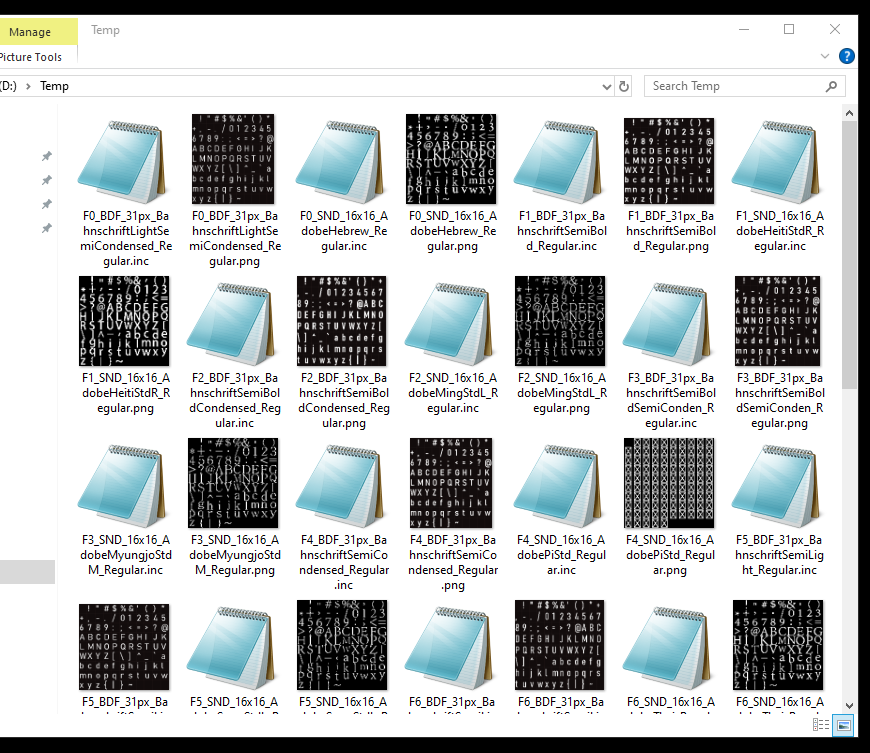
A generated font has an INC file and a matching PNG preview.
Use Edit Font File when an exported font needs a small correction. The original Windows font is not required.
The application identifies the format from the file contents and rebuilds the output tables from the edited characters when you save. BDF bitmap offsets and ink dimensions are updated as needed; existing character advances are retained. You do not need to recalculate table positions yourself.
Saving here only touches the .inc
Saving updates only the .inc file — it does not refresh a previously generated PNG. The loaded file also has its own editing state, kept separate from whatever is open on the Font & Preview tab.
Application messages use the same glass appearance as the main window. They explain invalid settings, completed actions, failed jobs and filename collisions.
Use OK to dismiss an information or error message. Yes/No confirmations require a choice. Enter activates the default button, Tab moves focus, and Alt+O, Alt+Y or Alt+N activates the matching choice. Escape closes an OK message; it does not dismiss a Yes/No confirmation. Ctrl+C copies the message title and text. Long messages can be scrolled.
The Windows file and folder pickers retain their system appearance.
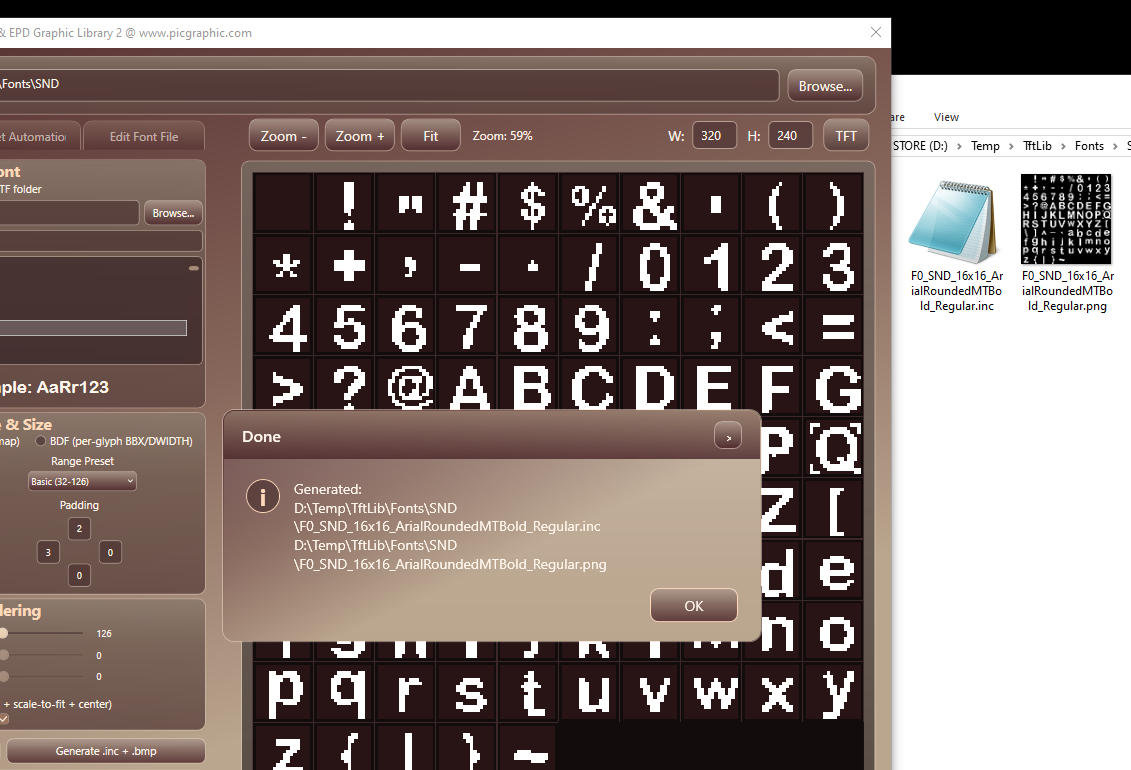
The completion message identifies the generated files.
Weight uses a few discrete pixel adjustments. Move it farther or compare another size or engine.
The filename describes the rendering scale. The visible ink rectangle depends on each character's shape.
Check the message for a filename collision, invalid input or missing font selection. Declining the rollover confirmation also leaves the queue unchanged.
Batch jobs render from the font settings, without the single-preview pixel corrections. Generate the edited font directly or correct the exported .inc.
SND is convenient when individual digits must stay in fixed positions. BDF is useful for proportional labels and menus. When replacing proportional text, clear the old text area and redraw the updated string to avoid leftover pixels.
Positron Font Foundry · SND vs BDF Fonts
Created with the Personal Edition of HelpNDoc: Create iPhone web-based documentation